
Welcome to your Water Colour Kit!
Let’s learn how to paint a beautiful wooly warm scarf with watercolours.
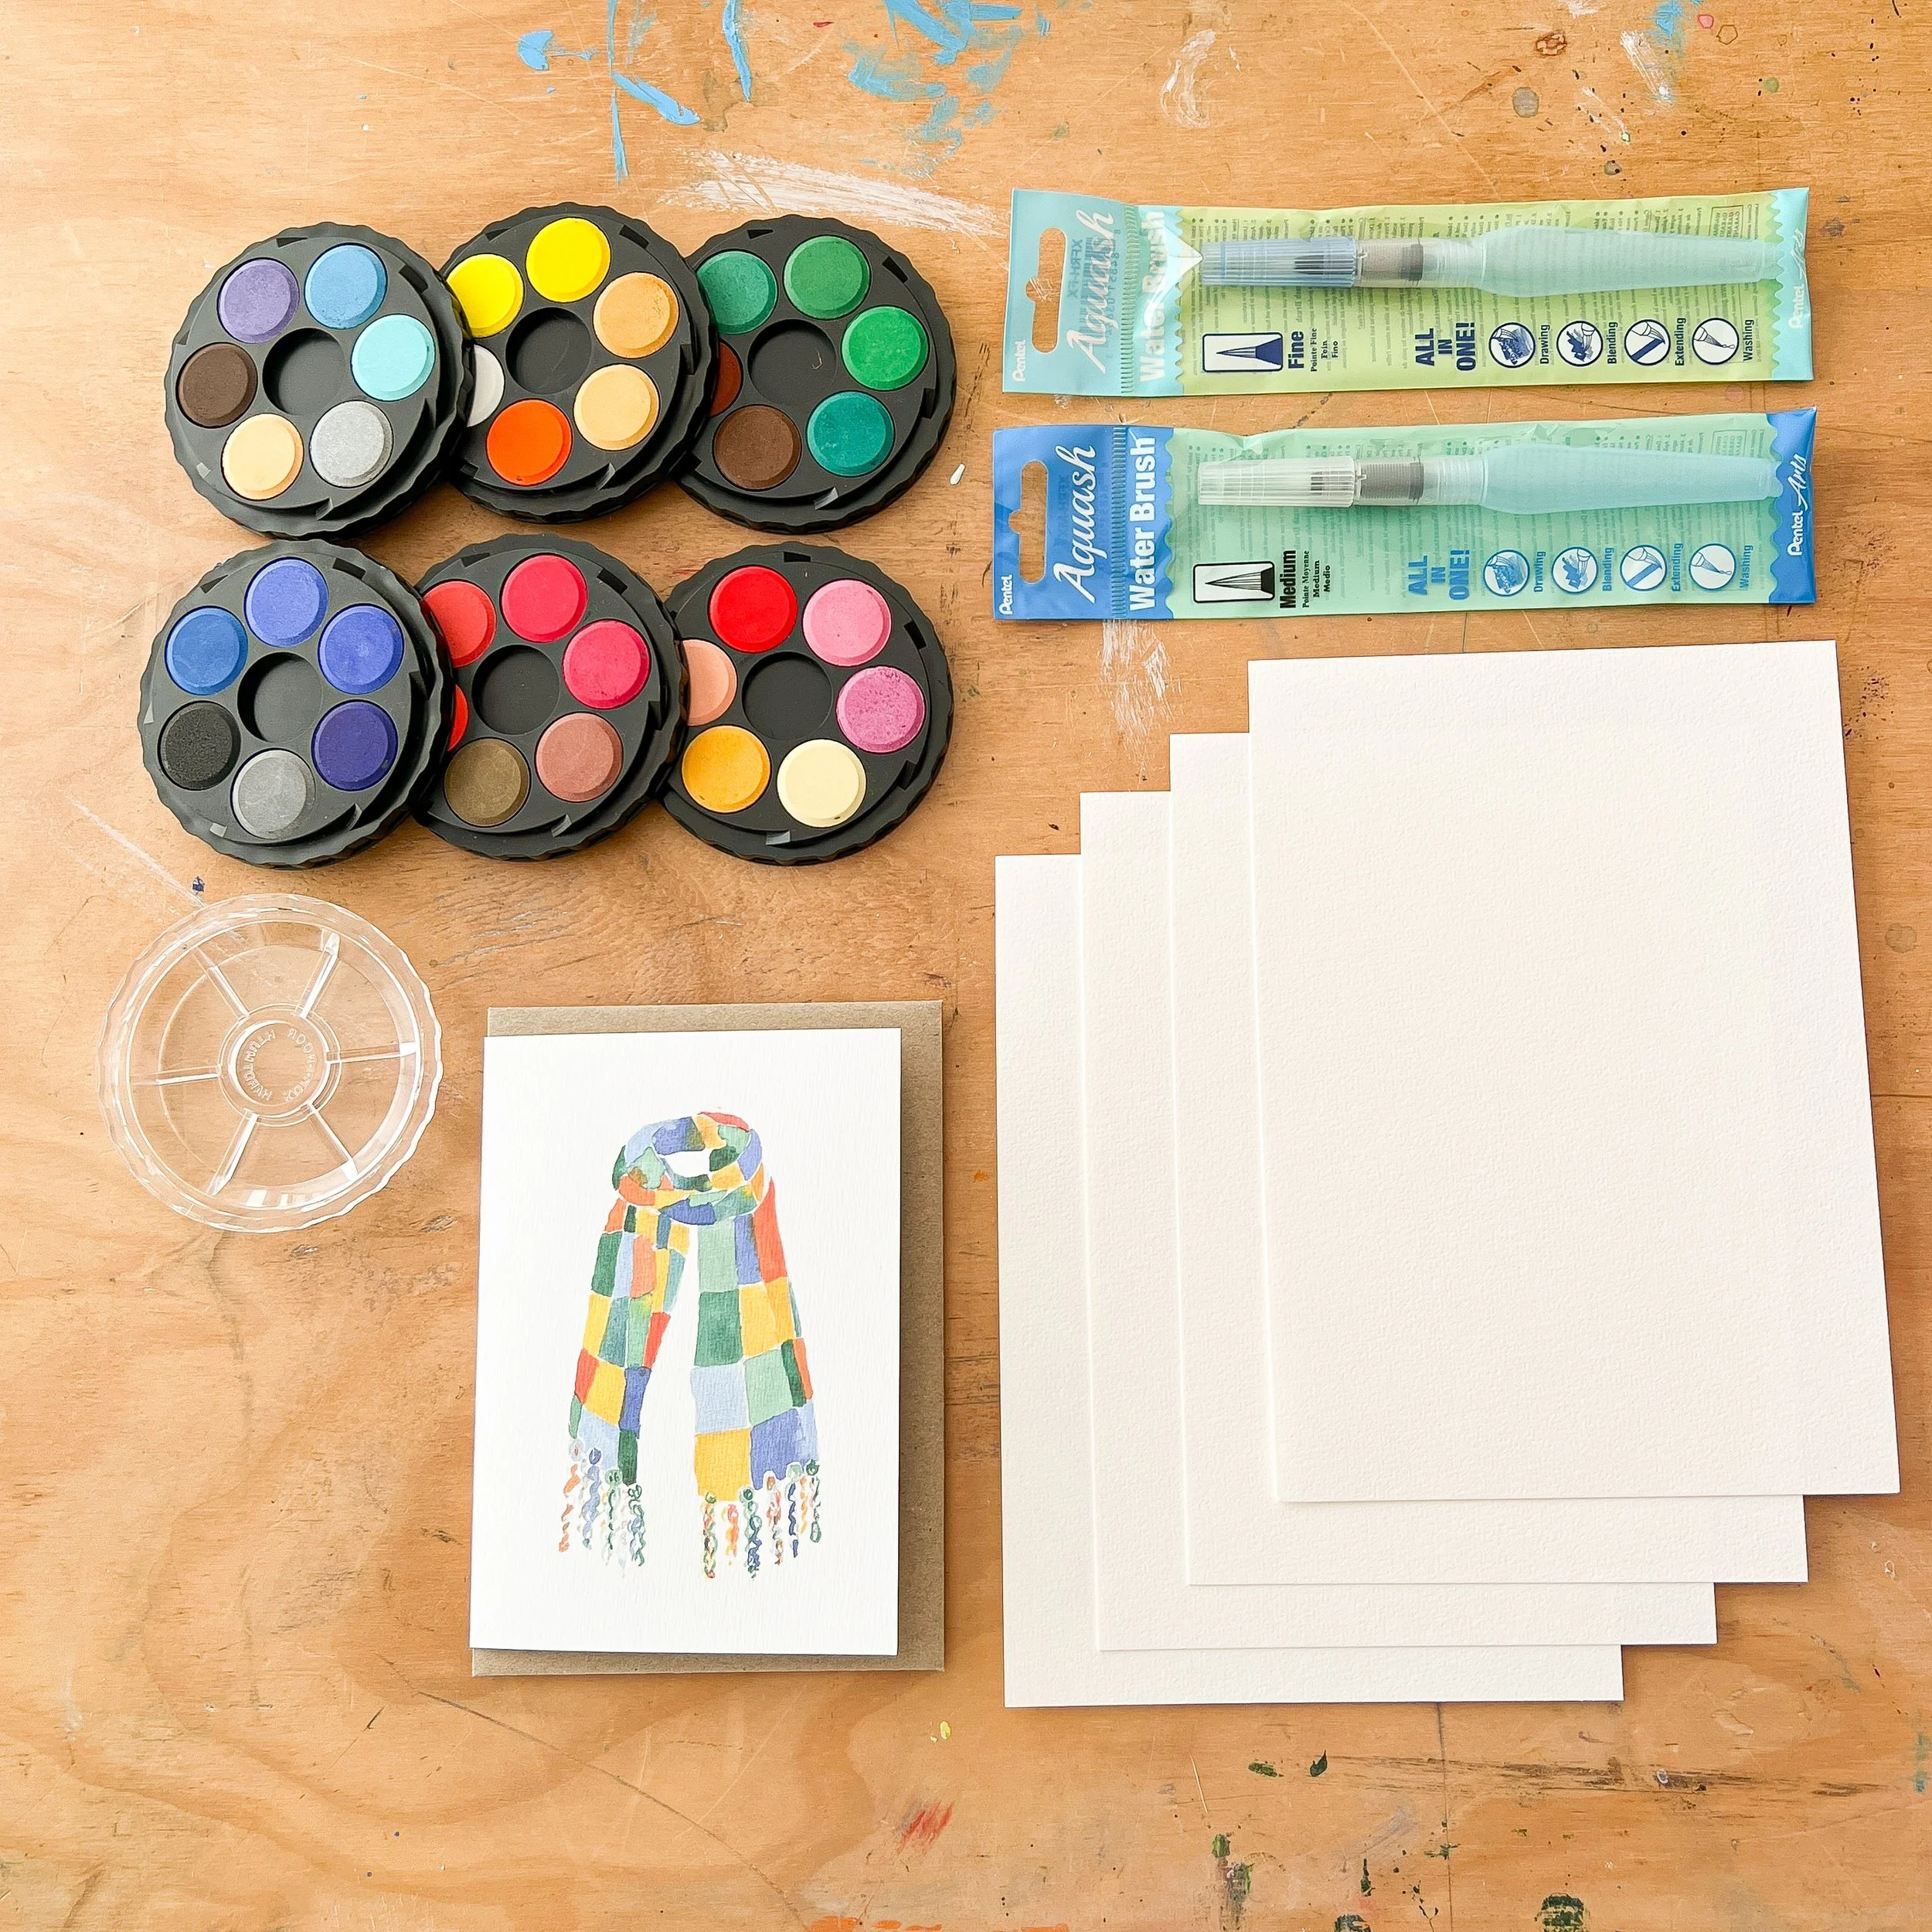
Materials you’ll need:
Provided in your kit:
36x bright, beautiful watercolours
4x sheets of high quality watercolour paper so you can play
2x Japanese water brushes
An example artwork in card form to copy (and you can use the card later!)
A thorough DIY guide full of tips and tricks
A recycled cardboard box to keep all your supplies together
Other things you’ll need:
A little cup of water (or two!)
A pencil (HB or 2B would be good)
An eraser
A paper towel
Some great music to help you get in the mood (I like this YouTube channel)
Step one: The sketch!


Tip: be sure to read each section or step before you begin to get an idea of what you’ll need to do.
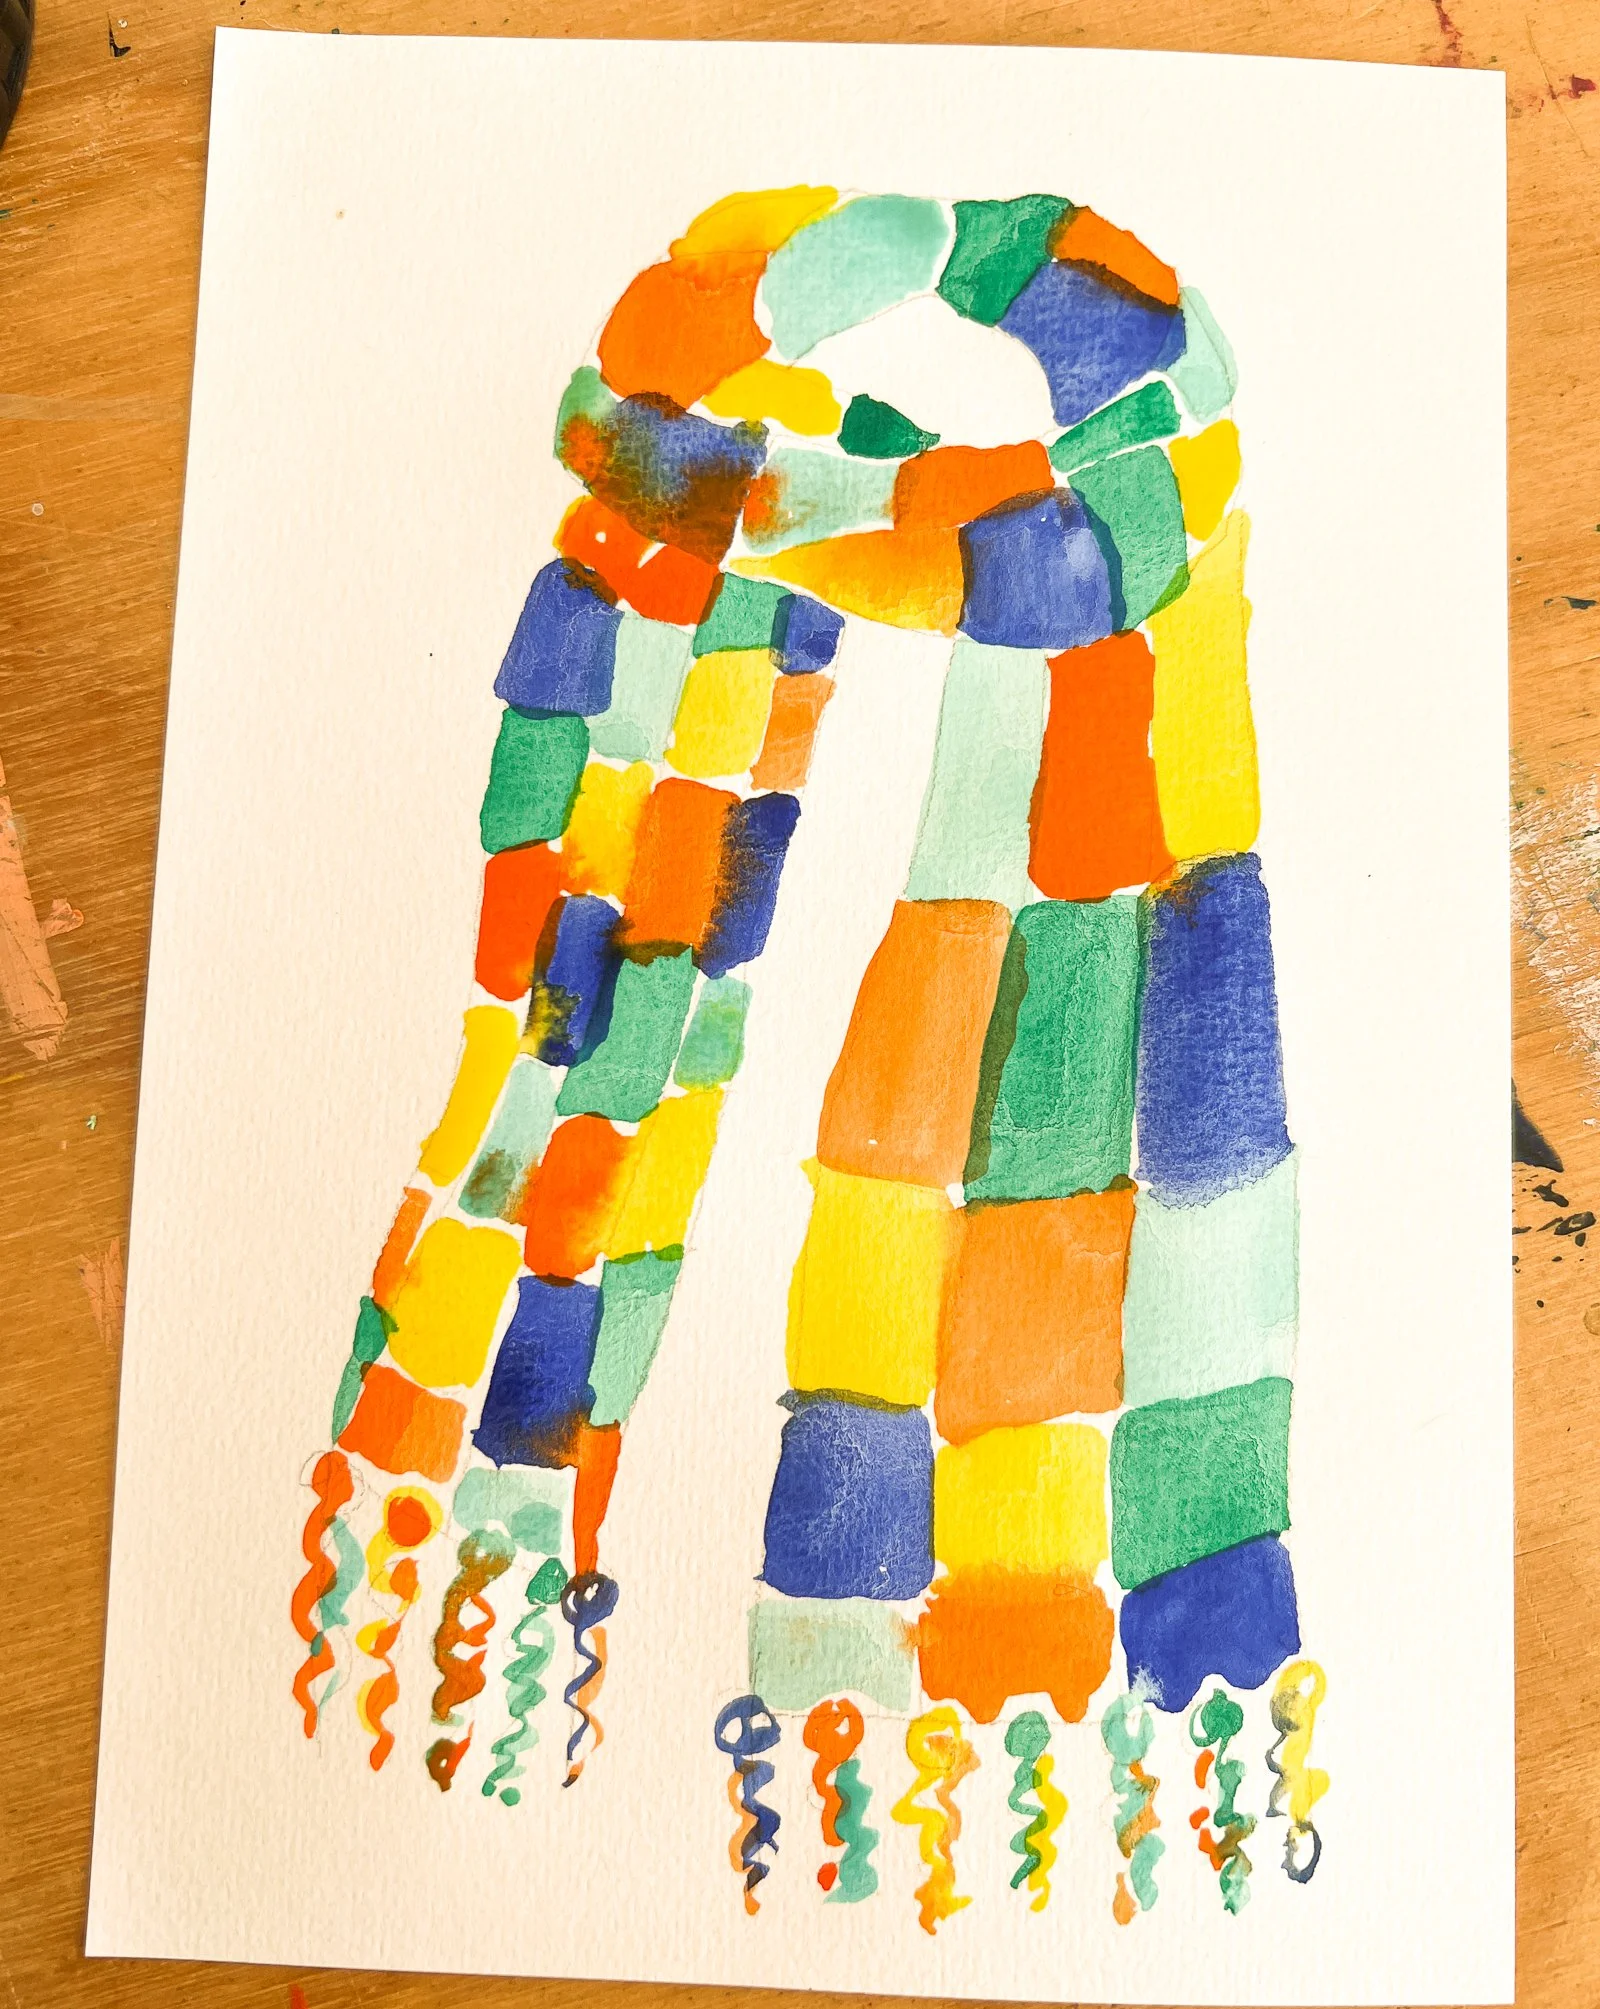
Start by creating a sketch of the scarf. You can use your own scarf as inspiration, or use my template.
If you’re drawing using my template, draw a circle to start with, in the top third of the page.
After you’ve got a circle, draw the two ends of the scarf coming down the page ending just before the bottom.
Try to leave about a fingers width of space around your sketch.
Add a line across the bottom of your scarves, leaving space for tassels
Add in your tassels. These could be wrapping around, like mine are, or fluffy and floofy pom poms.
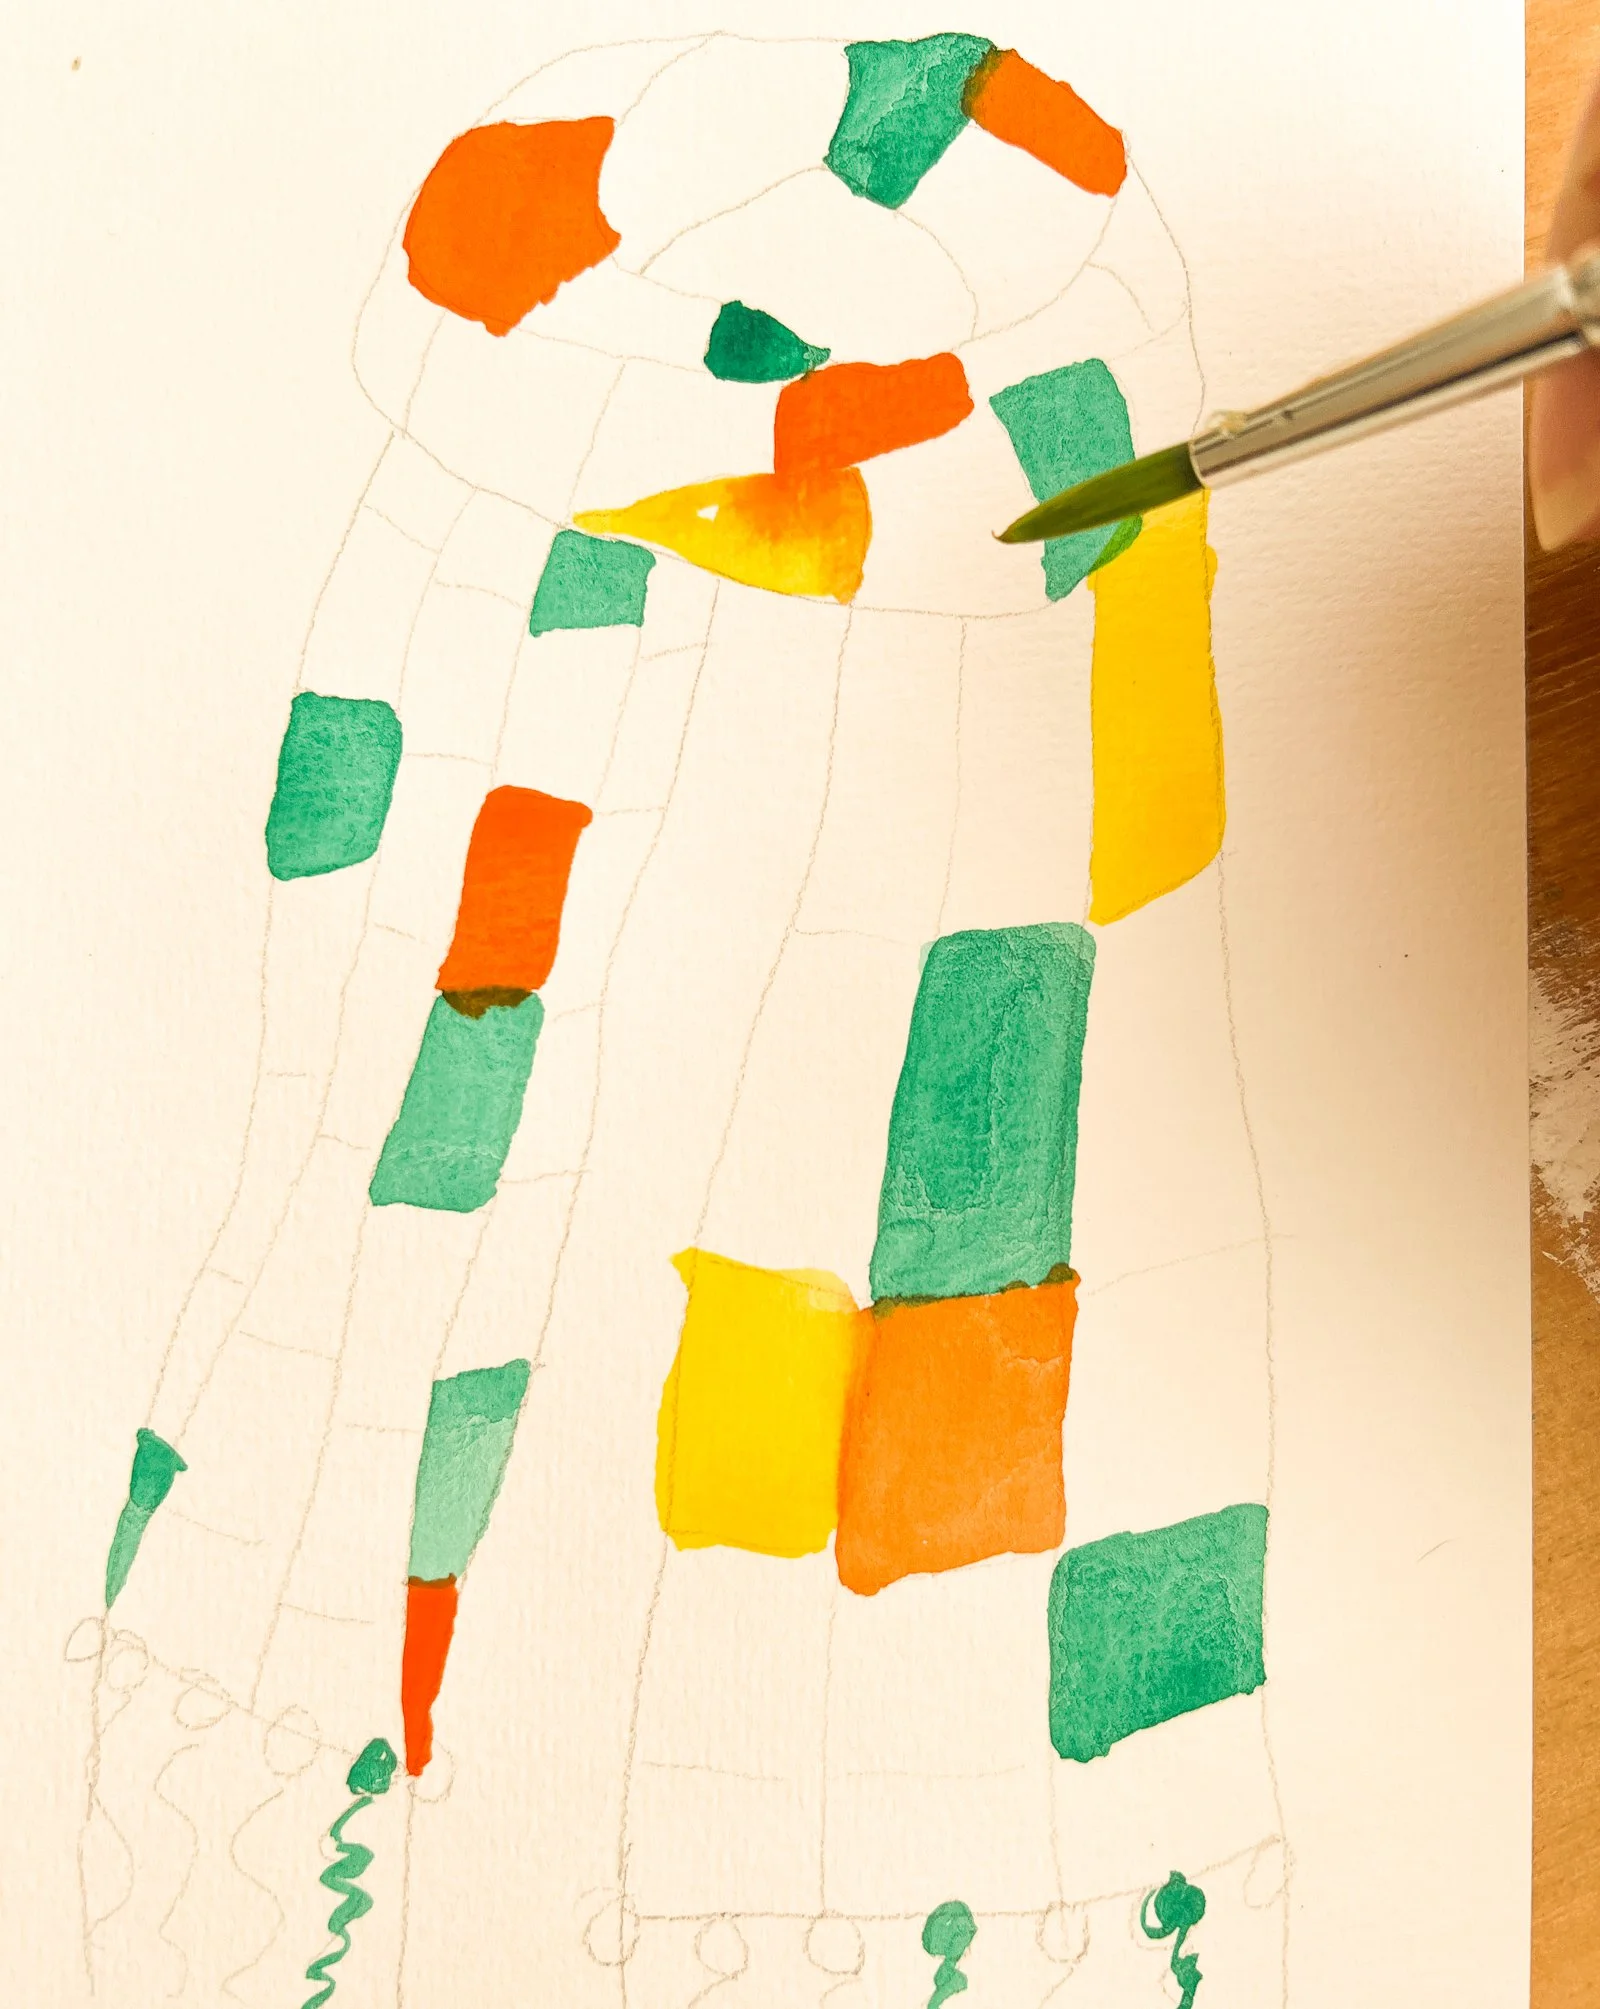
Add in your ‘patches’. For this design, I draw rectangles around my scarf showing the different folds by skewing them slightly around the scarf.
Tip: You might want to erase some of your lines at this point, as watercolour paint will lock in your pencil lines. You won’t be able to erase them once the paint is down!
Step two: Activating your Water Colour Paint


Unwrap one of your Japanese brushes. You should be able to see one is a little bigger than the other.
Tip: Use which ever one you feel most comfortable with, but a smaller brush generally will give you more control.
Dip your brush into your cup of water to pick up some water, and without wiping too much water off bring it to the paint pan and colour you’d like to use.
Tip: You can fill these brushes with water for travelling! Twist the cartridge off the brush tip, fill with water and then when you gently squeeze the brush water will be dispensed. I don’t always use this brushes in this way, but it’s very handy for when you’re on the go or don’t have water on hand (at cafes, on planes and trains, for example!).
Gently scrub your brush back and forth over the pan. You’ll be able to see the colour starts to appear on your brush. The more you scrub, the more paint will be on your brush and the more saturated the colour. If you want more transparent colour or lighter colour, add more water.
Step four: Time to paint!


Take your brush and gently touch it to the paper. Pull your brush around the square to fill it with the colour
Tip: Watercolour paper really needs to be used when ever you are painting with water colour paint. Watercolour paper is treated with or made with a product called ‘size’. Size allows water to sit within the paper instead of disintegrating it. If you’ve ever used watercolours on printer or cartridge paper, you’ll know what I mean! The paper will start to bit, ball up and eventually you’ll make your way right through it.
For this design, I like to add this colour all over the patches, making sure there aren’t two of the same colour next to each other.
You can dip your brush back into your cup of water, give it a good scrub and then bring it back to another colour to change colours.
Choose your next colour and load up your brush. Remember, more paint on your brush will give you a brighter more saturated colour and more water will lighten the colour.
Tip: If you’re colours are getting a little muddy, use your paper towel to give your brush a clean. You can also use your paper towel to absorb a bit of the water or paint on your brush, or test colours before using them.
When placing your next colour, you may bump up against other colours. If the first colour is dry, the colours won’t mix together. If the first colour is wet (tip: look for a glossy sheen to tell if the paint is still wet) then the colours will start to run into each other. I like both looks, and love seeing the little ‘blooms’ or ‘fireworks’ of different colours running into each other.
Tip: When the colour underneath is dry, this technique is called wet on dry in watercolour painting. When the colour underneath is still wet and you add more, this is called wet on wet painting.


Step five: Tassel time
While painting your scarf patches, you might want to add a little of that colour to your tassels or pom poms on the bottom of the scarf.
Be sure to have a nice variety of colours along the bottom, and try to mix one or two colours together on each tassel for a natural look.


Step six: You did it!
Congratulations - your beautiful masterpiece is now ready to frame and hang on your wall.
Remember, you have four pieces of paper so you can try your scarf again with some different colours or a different style. You could also fold the paper to create cards, just add an evelope!